Step-by-step-guide-to-a-natural-diy-skin-care-routine
In recent years, You probably see, there has been a significant shift towards natural/organic skincare products in the beauty industry.
People are becoming more conscious about what they apply to their skin, preferring ingredients that are organic and free from synthetic chemicals. And that is absolutely fine.
However, as a pharmacy student, I want to emphasize that ‘chemical’ isn’t synonymous with harmful.
Many chemicals are formulated for our wellbeing and are rigorously tested for safety.
And listen, not all natural ingredients are safe for everyone, and not all chemicals are toxic.
The key is balance.
Combining the best of nature with safe, effective chemicals can lead to a skincare routine that’s both nurturing and scientifically sound.
Okay, why I am sounding like a politician? Like, I support both, but here is the history:
As a teenager, I always preferred natural skincare products.
However, after struggling with acne, I discovered the transformative power of chemical ingredients like salicylic acid and benzoyl peroxide.
Along with natural remedies like aloe vera, turmeric powder, clay powder, and many.
These ingredients, combined with a healthy lifestyle, have truly changed my skin for the better.
And now I understand the importance of both. I support only clean cosmetic and safe natural remedies.
No, I didn’t lie to you. Today, I’ll only share for those of you who are passionate about organic and want to steer clear of synthetics, I’m here for you.
Let’s explore how you can create an effective skincare routine using only the gifts of nature.
Interesting posts:
10 Reasons Why Red Clay Powder Should Be A Staple In Your Skincare Routine
Here are step-by-step guide on How to Create a Natural DIY Skincare Routine
Step 1: Understanding Your Skin Type
Before creating any skincare routine, it’s crucial to understand your skin type. Here’s a quick breakdown:
Oily Skin: Prone to excess sebum and shine, often leading to acne. People with oily skin often find their faces become shiny within a few hours of washing, and they may struggle with large pores and frequent breakouts.
Dry Skin: Feels tight and may have flaky patches. Dry skin can often feel rough to the touch and may show signs of aging more quickly, such as fine lines and wrinkles.
Combination Skin: Oily in some areas (typically the T-zone) and dry in others. This skin type requires a balanced approach, as different areas of the face have different needs.
Sensitive Skin: Easily irritated and prone to redness and reactions.Those with sensitive skin often have to be very cautious about the products they use, as even natural ingredients can sometimes cause irritation.
Note: Your skin type can change with the seasons, age, and other factors, so it’s good to reassess periodically. Factors like hormonal changes, diet, and climate can all affect your skin type, so stay attuned to how your skin feels and behaves.
STEP 2: DIY Natural Face Washes:
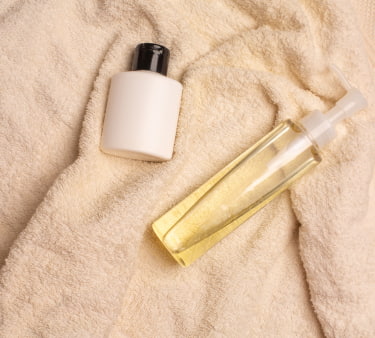
Cleansing is the foundation of any skincare routine. It removes dirt, oil, and makeup, preparing your skin for the next steps.
A good cleanser will clean your skin without removing its natural oils, maintaining its hydration and balance.
Oil Cleansing Method: Mix a combination of oils suitable for your skin type, such as jojoba oil, castor oil, and olive oil. Apply the oil mixture to your dry face and massage gently for a few minutes.
Wet a washcloth with warm water and place it over your face for about a minute to steam your pores.
Gently wipe away the oil with the washcloth. Repeat if necessary.
For Oily Skin:
Honey and aloe vera Cleanser: Mix 2 tablespoons of raw honey with 1 tablespoon of pure aloe vera gel until smooth and apply. Although this cleanser is for oily skin yet is gentle and suitable for all skin types, offering natural cleansing and soothing benefits.
For Dry Skin:
Milk and Honey Cleanser: Combine one tablespoon of raw honey with two tablespoons of milk. Milk’s lactic acid gently exfoliates while honey moisturizes.
For Combination Skin:
Aloe Vera Cleanser: Blend two tablespoons of aloe vera gel with one tablespoon of coconut oil. Aloe vera soothes and hydrates, while coconut oil gently cleanses.
For Sensitive Skin:
Oatmeal Cleanser: Mix one tablespoon of ground oats with a bit of warm water to form a paste. Oats are incredibly soothing and help reduce inflammation.
CHECKOUT:
7 Best Korean Foam Cleansers For Acne-Prone Skin-That Won’t Dry Out Your Skin!
Step 3: DIY natural face scrubs
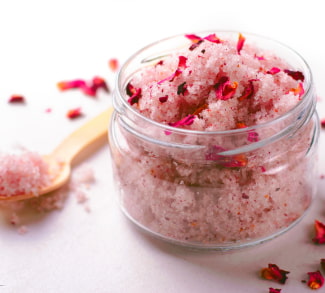
Exfoliating helps to remove dead skin cells, promoting a brighter complexion and smoother texture. However, be gentle – over-exfoliation can damage your skin.
For All Skin Types:
Sugar and Olive Oil Scrub: Mix one tablespoon of sugar (Finely ground brown or white) with one tablespoon of olive oil.
This simple scrub exfoliates without being too harsh if you use sugar in powdered form.
For Sensitive Skin:
Rice Flour and Honey Scrub: Combine one tablespoon of rice flour with one tablespoon of honey.
Rice flour is a gentle exfoliant, perfect for sensitive skin. Apply the mixture to your face, rub gently, and rinse off. This scrub not only exfoliates but also soothes the skin.
For extremely sensitive skin:
If you have extremely sensitive skin, prefer using oatmeal and yogurt DIY natural scrub. Oatmeal is a gentle exfoliant suitable for all skin types, including sensitive skin.
Yogurt contains lactic acid, which helps to exfoliate and moisturize.
Note: Exfoliate no more than twice a week to avoid irritation. Over-exfoliating can strip your skin of its natural oils and lead to sensitivity and redness. Always follow up with a good moisturizer to keep your skin hydrated.
Step 4: DIY natural refreshing Toners
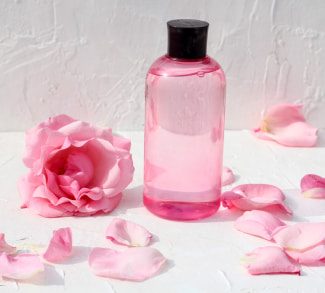
A toner helps to balance your skin’s pH levels and tighten pores. It also prepares your skin to absorb the nutrients from your serums and moisturizers more effectively.
NOTE: This step isn’t necessary. I believe you have a good moisturizer and serum to include in your skincare routine.
Apple Cider Vinegar Toner: If you have oily skin with acne, use this.
Mix one part apple cider vinegar with two parts water.
This toner effectively manages oil levels to deter breakouts and prevent breakouts. Apple cider vinegar has antibacterial properties and helps to balance the skin’s pH.
Note: Don’t use ACV directly on the skin without diluting it with water. It’ll irritate your skin.
Rose Water Toner: Simply use pure rose water. It’s hydrating, soothing, and smells divine.
Spray or apply with a cotton pad to your face after cleansing. Rose water helps to calm and hydrate dry skin, leaving it feeling refreshed. Suitable for every skin type.
Green Tea Toner: Create a Green Tea Toner by brewing a cup of green tea and allowing it to cool to room temperature.
Green tea is rich in antioxidants and helps balance the skin. This toner helps to reduce inflammation and provides a burst of hydration.
CHECKOUT:
The 10 Best Korean Toners For Acne Prone Skin
Step 5: DIY natural face Serums/ Eye creams
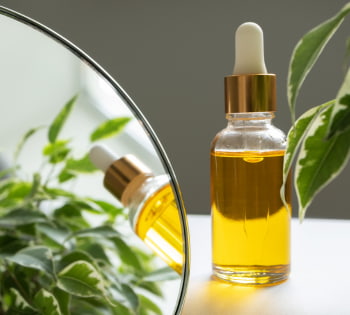
Serums provide concentrated nutrients to address specific skin concerns. They penetrate deeply into the skin and deliver a high concentration of active ingredients. It is necessary to add serum to your skincare routine.
For All Skin Types:
Aloe Vera and Vitamin E Serum: Mix two tablespoons of aloe vera gel with the contents of one vitamin E capsule. This serum is hydrating and healing.
Apply a few drops to your face, then gently massage it in. Aloe vera soothes the skin, while vitamin E provides powerful antioxidant benefits. You can also use it as an eye cream.
For Anti-Aging:
Rosehip Oil: Apply a few drops of rosehip oil to your face. It’s packed with vitamins A and C, promoting cell regeneration and reducing wrinkles.
Rosehip oil also helps to improve skin tone and texture, making it a wonderful anti-aging treatment.
CHECKOUT:
The 5 Best Korean Vitamin C Serums For Acne-Prone Skin-Which Won’t Irritate Your Acne
Step 6: DIY Natural Moisturizers
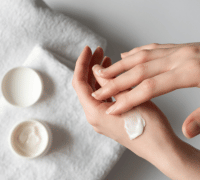
Hydration is crucial for maintaining the health and vitality of your skin.
It helps to lock in the benefits of your serum and keeps your skin soft and supple.
For Oily Skin:
Aloe Vera Gel: Use simple aloe vera gel. Aloe vera gel is light, hydrating, and non-comedogenic (won’t clog pores).
Apply a thin layer to your face after your serum. Aloe vera helps to hydrate the skin without making it greasy. (Personally my favorite)
For Dry Skin:
Shea Butter and Coconut Oil: Mix equal parts shea butter and coconut oil. This rich moisturizer deeply hydrates dry skin. This combination provides intense moisture and helps to repair the skin’s barrier.
For Combination Skin:
Jojoba Oil: Jojoba oil closely mimics the skin’s natural sebum, making it ideal for combination skin.
Jojoba oil helps to balance the skin, providing hydration where it’s needed without making oily areas worse.
CHECKOUT:
The 5 Best Korean Niacinamide Moisturizers: A Game-Changer For Oily And Acne-Prone Skin
Step 6: DIY natural Special Treatments
These treatments are optional but can provide additional benefits based on your skin’s needs. They can be used as needed to target specific concerns.
For Acne-Prone Skin:
Tea Tree Oil Spot Treatment: Dab a bit of tea tree oil onto blemishes.
It’s a natural antiseptic and helps reduce inflammation. Apply directly to the affected areas with a cotton swab. Tea tree oil can help to clear up acne and prevent new breakouts.
For Dark Circles:
Two natural remedies that are often recommended and have shown positive results are Vitamin E and Almond Oil.
I have been using it since 2018, and the success rate is 50%. (I have a horrible dark circle).
To make the remedy, mix a few drops of Vitamin E oil with a few drops of almond oil. Always use gentle, circular motions to avoid causing stress to the delicate skin around the eyes.
Apply these remedies regularly, preferably every night before bedtime.
For Extra Hydration:
Honey Mask: It is so simple to use. Apply a thin layer of raw honey to your face and leave it on for 15-20 minutes.
Honey acts as a natural humectant, actively drawing moisture from the environment into your skin, leaving it hydrated and supple.
Note: Always patch-test new treatments to ensure they don’t irritate your skin.
Step 7: Essential Sun Protection
Sun protection is an absolute must in any skincare routine, ensuring your skin stays shielded from damaging sun rays.
While DIY sunscreens are not recommended due to their unreliable protection, wearing protective clothing and seeking shade are natural ways to protect your skin from UV rays.
Step 8: DIY natural Weekly Treatments
Weekly treatments are like giving your skin a little extra love and attention. These treatments address specific concerns and provide an additional boost to your routine.
Options for Weekly Treatments:
Clay Mask for Oily Skin: Bentonite clay is excellent for drawing out impurities and controlling oil. It is my go-to mask for my oily, acne-prone skin. It immediately makes my skin clean and soft.
But don’t forget to moisturize after washing off your face.
To make this paste mix one tablespoon of clay with water or apple cider vinegar to form a paste. Apply to your face, let it dry, and rinse with warm water.
You can feel the deep-cleansing action as it leaves your skin feeling purified and refreshed.
Avocado Mask for Dry Skin: It is another great mask. Avocado is rich in healthy fats and vitamins, making it a nourishing treat for dry skin. Mash half an avocado mix with one tablespoon of honey and apply.
Step 8: Holistic Lifestyle Matters

The health of your skin mirrors your overall state of well-being.. Embrace a holistic approach to skincare by taking care of your body and mind.
Stay Hydrated: Everybody knows this. Maintain hydration by drinking ample water throughout the day. It’s a simple way to keep your skin glowing and healthy from the inside out.
Eat Well: Enjoy a balanced diet packed with fruits, veggies, and healthy fats. Foods rich in antioxidants, vitamins, and minerals work wonders for your skin’s health.
Get Your Beauty Sleep: Make sure you get enough rest every night. Good sleep gives your skin time to repair and rejuvenate.
Keep Active: Regular exercise is great for your skin too! It boosts circulation, helping to deliver oxygen and nutrients that keep your skin looking its best.
Manage Stress: I know it’s tough but please take time for yourself and engage in stress-busting activities like yoga, meditation, or anything that helps you relax.
I do pray while stressing. It helps me a lot. Keeping stress in check helps prevent skin issues caused by hormonal imbalances.
Final Thoughts: Step-by-step-guide-to-a-natural-diy-skin-care-routine
Creating a natural DIY skincare routine is a journey of self-discovery and self-care. It’s about understanding your skin’s unique needs and pampering it with the love and attention it deserves.
Each step, from cleansing to moisturizing, is a moment to connect with yourself and nurture your skin.
Experiment with different ingredients, listen to your skin’s responses, and enjoy the process of crafting your personalized skincare routine.
This journey not only enhances your skin’s health but also cultivates a deeper appreciation for the natural beauty within you. Here’s to glowing, healthy, and happy skin!
Be sure to Pin this Post for Later!

